
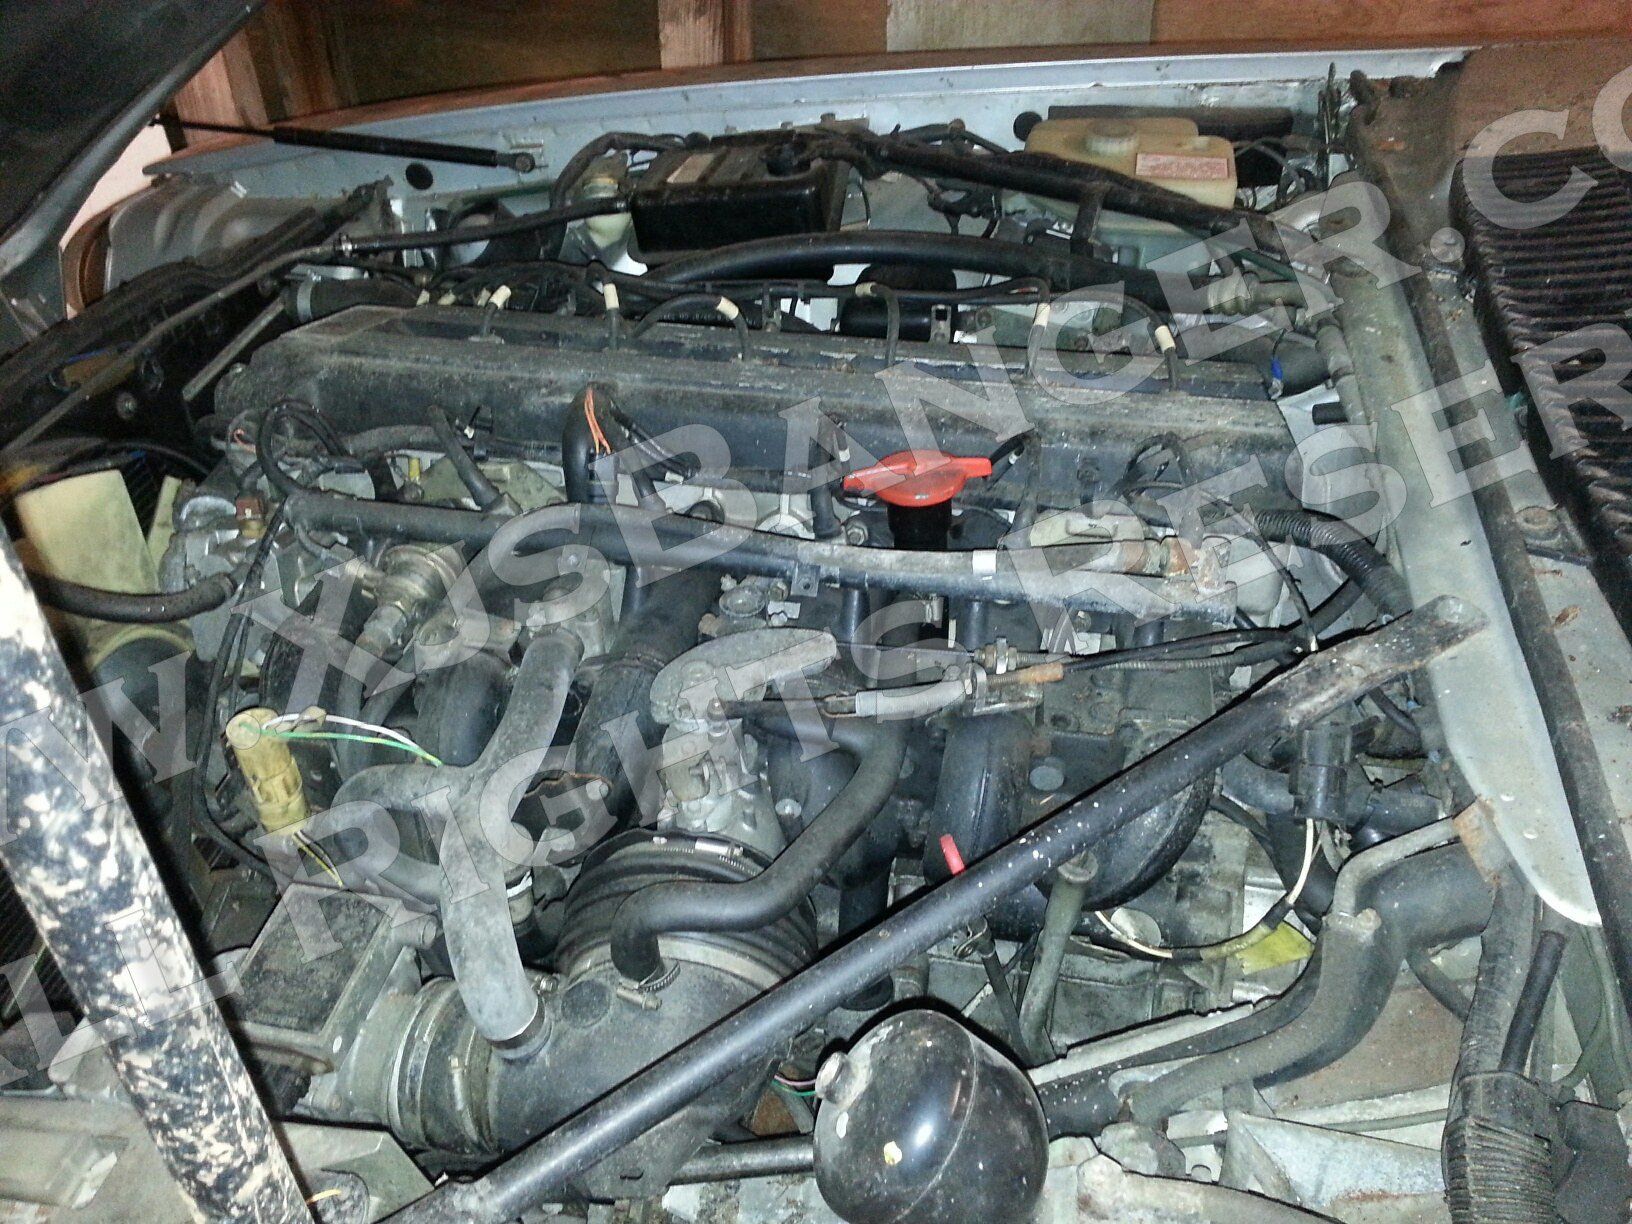
Jaguar XJS 3.6 AJ6 Engine Resurrection

This guide is especially recommended for each car classified as “barn find”, projects taking a nap longer than 10 years or amputations from breakers. Applicable to all Jaguars with AJ6 3.6 / AJ16 4.0 engine, all other cars and brands as well.
THIS GUIDE SHOWS HOW IT SHOULD BE DONE. Jaguar AJ6 is bulletproof enough to survive the instant cranking after 30 years of sleep, HOWEVER you will probably cut 100.000 miles from the engine lifespan in seconds. The choice is yours.
If you're buing barn XJS from trader "who managed to start it up already after sooo many years!" - ask fro a 50% price discount straight away, your almost-owned XJS is probably utchered already. My XJS purchase was a pure gamble, no risk, no fun* (this rule is applicable to AJ6 3.6 / AJ16 4.0 engines ONLY. What? what about V12 owners? I don't know. You're the 5.3 lover. Maybe build yourself a V12 TV stand or try to enter the missing vowel: W_NKER )
BEFORE YOU START
Order JumpStart spray on Amazon or eBay -big one or three smaller. Order cheapest semi or fully synthetic 10w40 engine oil and filter. Order 5L of coolant concentrate - ONLY G05 grade (ethylene glycol) no other rubbish, no subsititutes no "great products" recommended by George in EuroCarParts. Order Gasket making silicone and kneadable epoxy putty f.eg. "quicksteel". I assume that you have consummables like spark plugs, belts and filters under your bed. DO NOT skip pt. 29 as this is where the true fun starts.


15. Reinstall the battery.
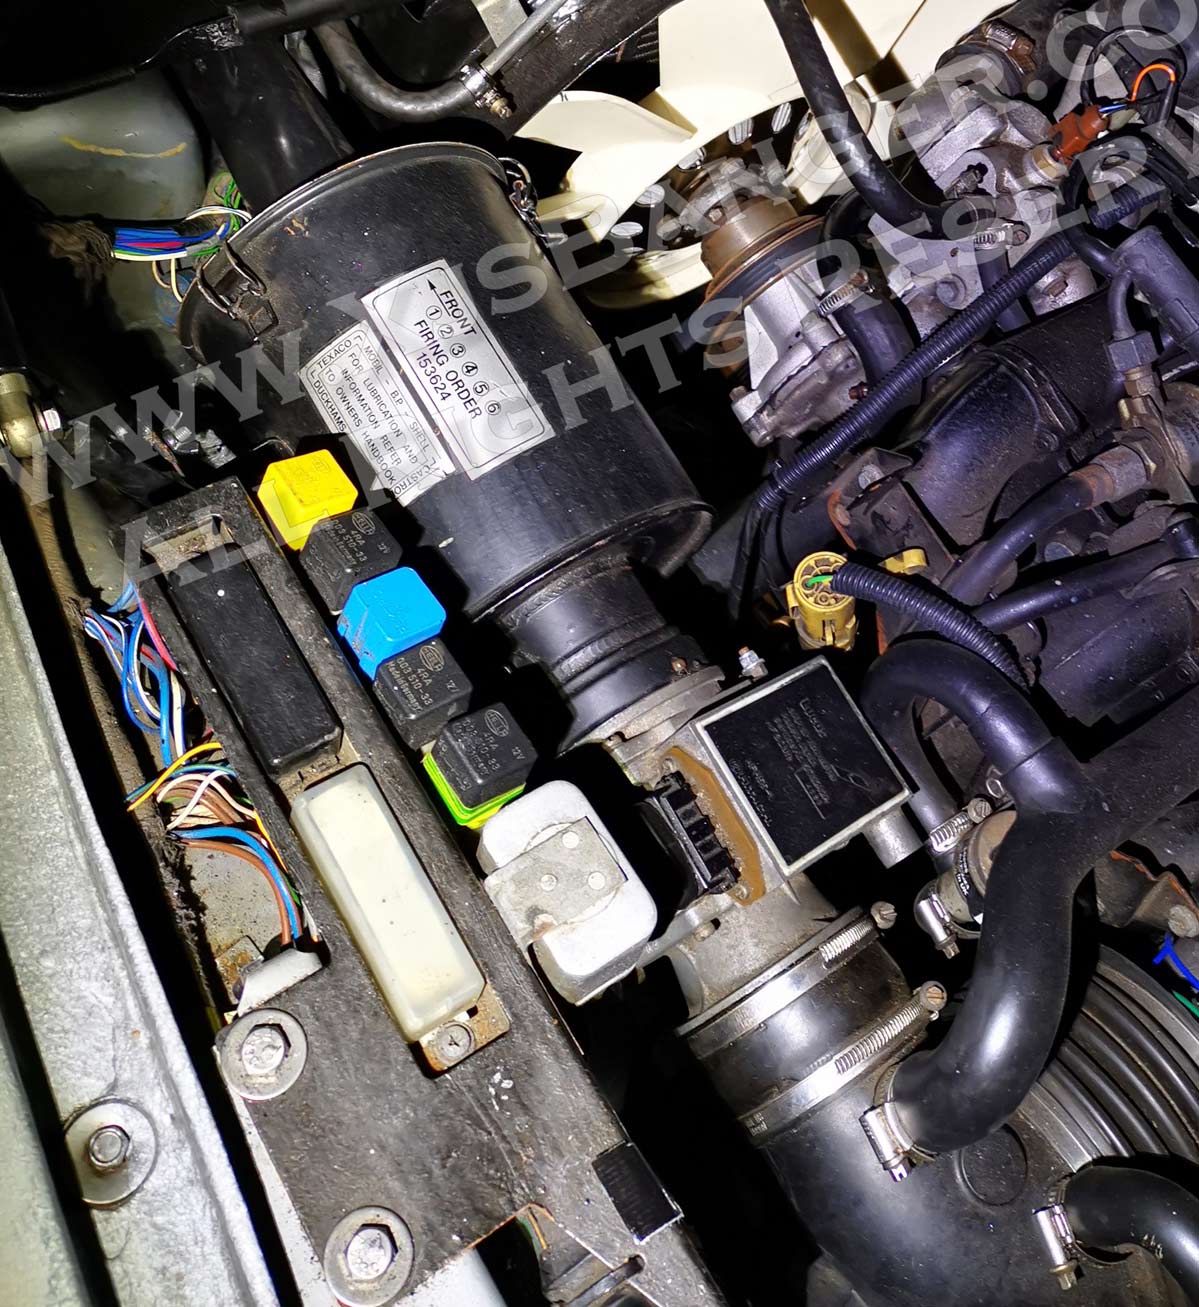
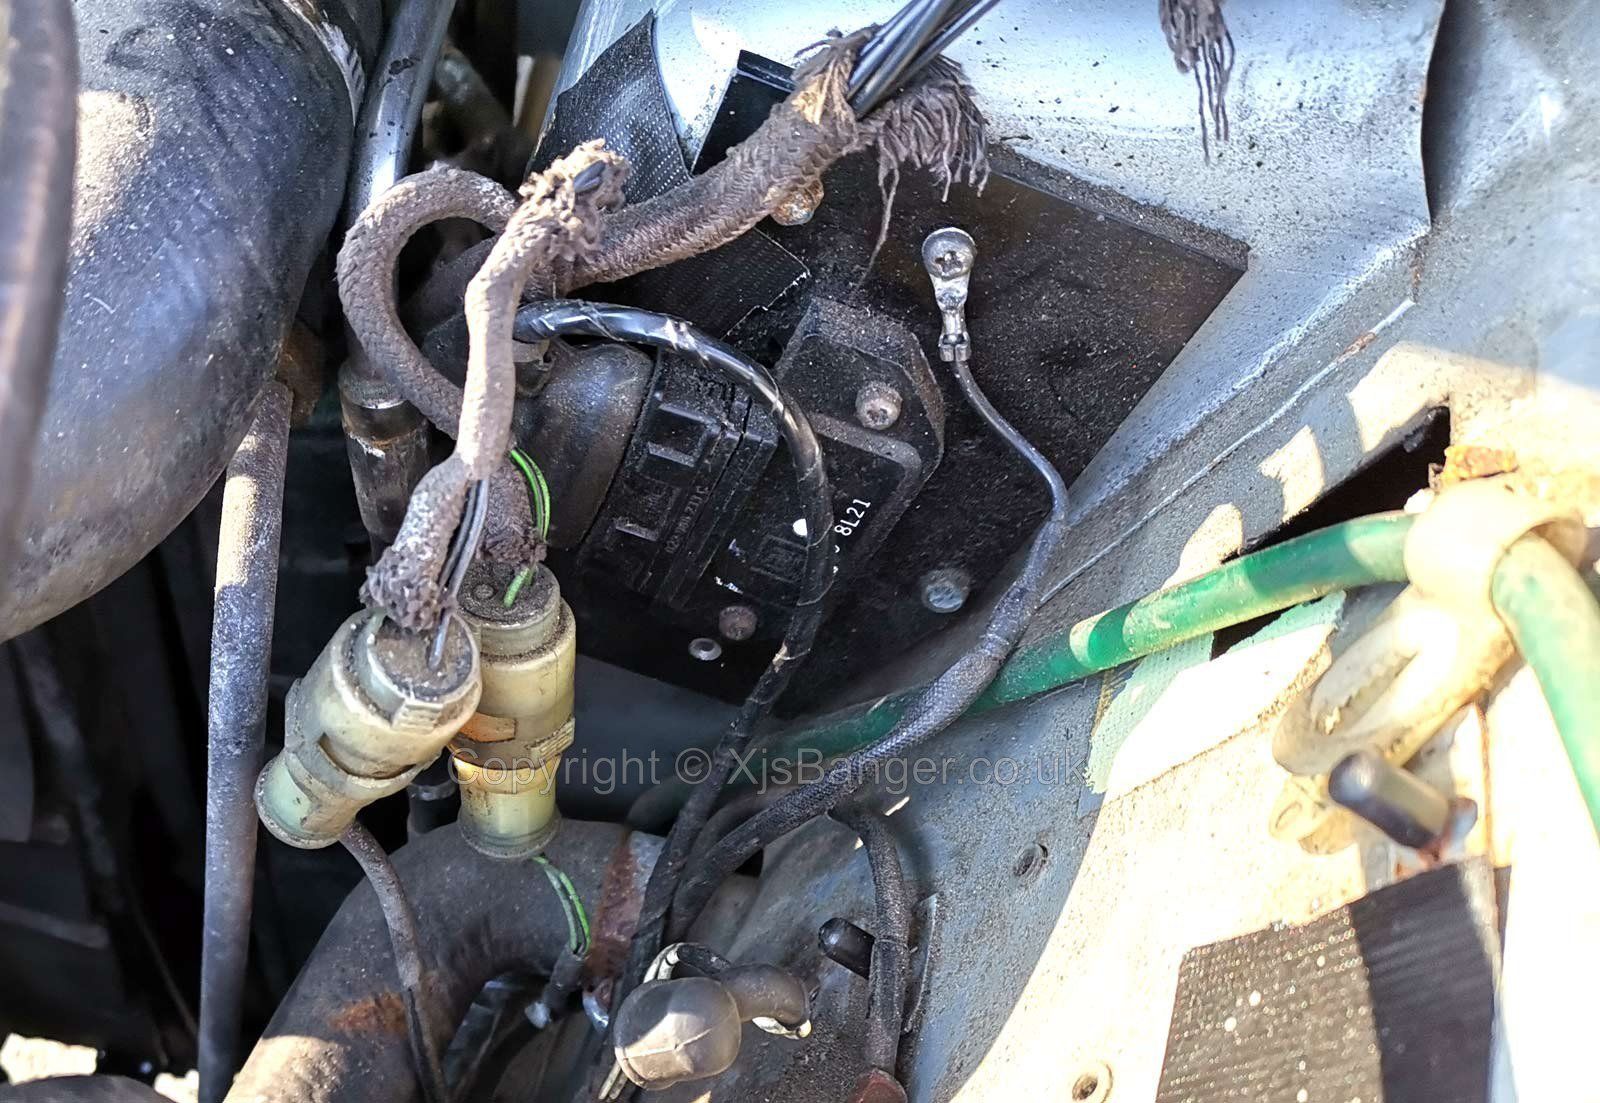
16. Find the inertia switch and lift the round pin up until you will see the orange shank (you've just disconnected fuel pump)
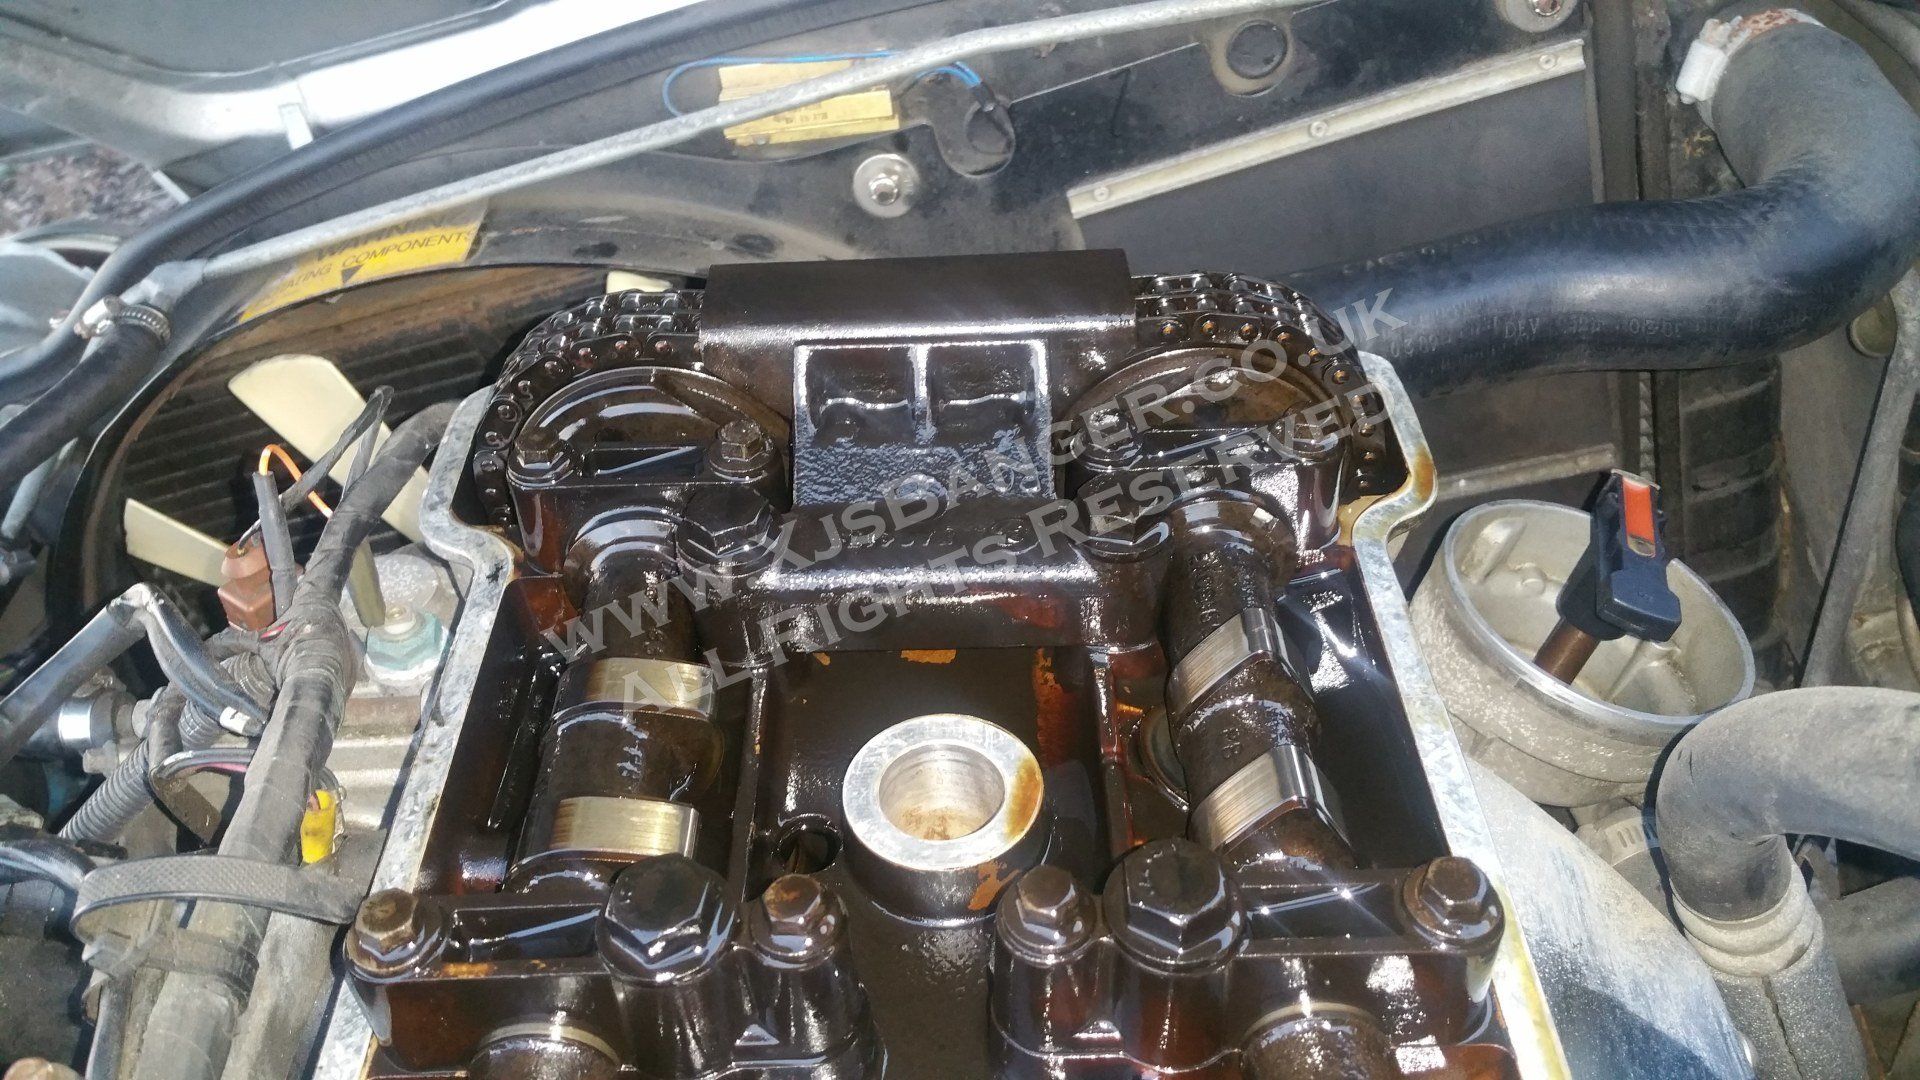
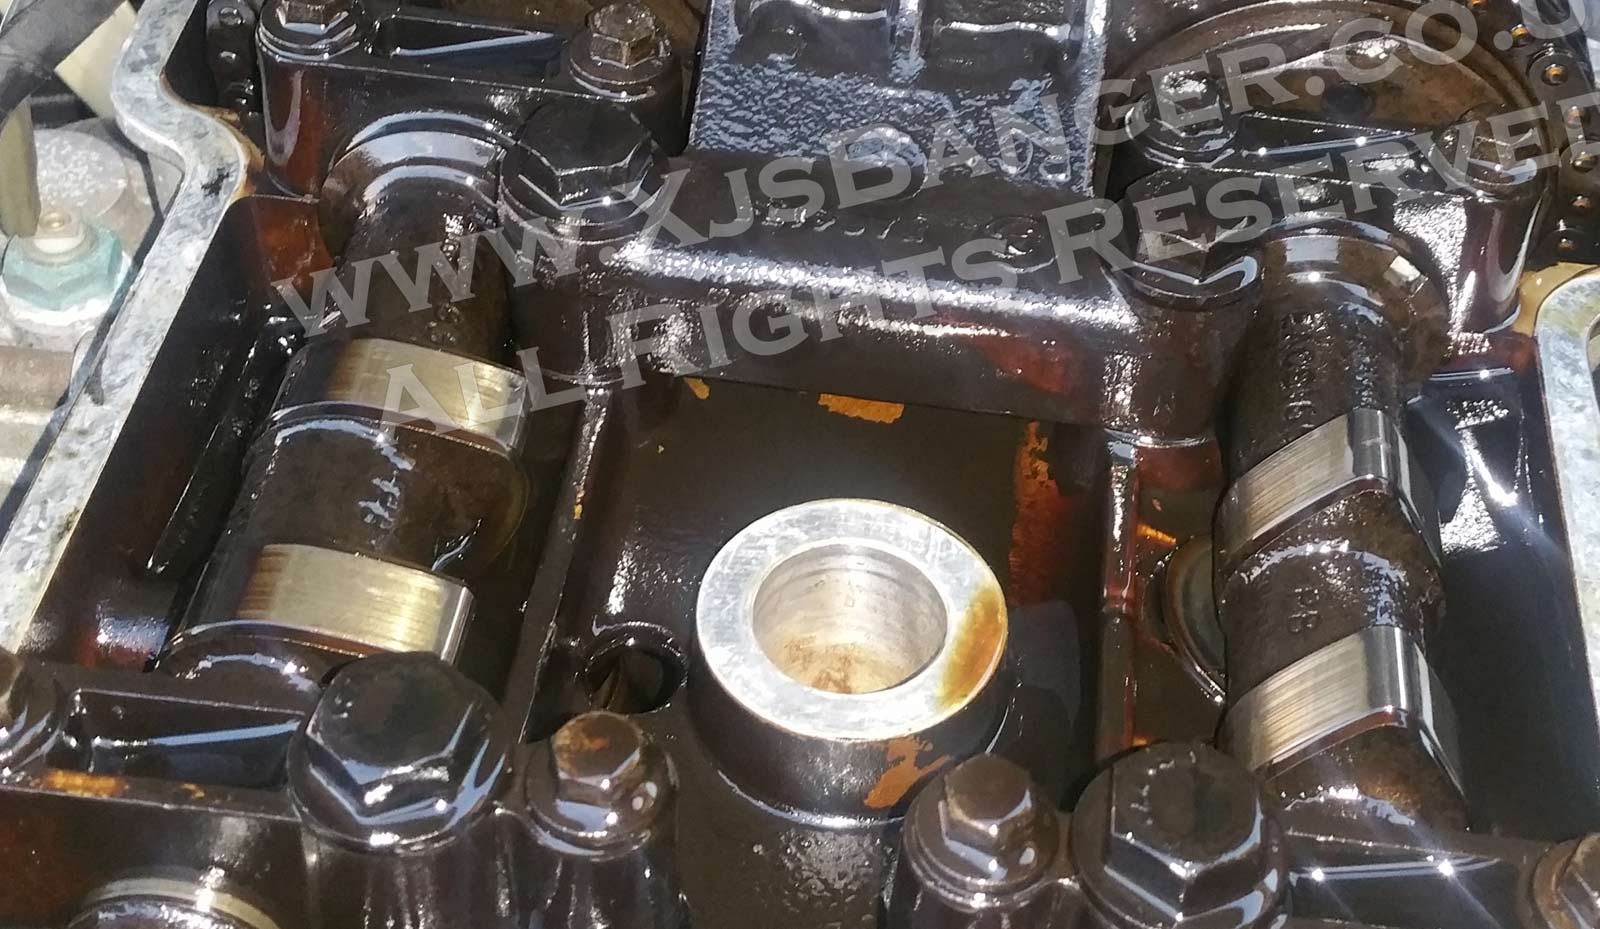
17. Pour down the oil on the cam shafts one more time and reinstall the cover. DO NOT reinstall the spark plugs.
18 TURN ON IGNITION KEY AND CRANK THE ENGINE for 2 seconds, then 3 seconds, then 5 seconds, then 10 seconds. then wait 5 minutes and spin again for 10seconds. Repeat until your battery dies. You should hear the engine spinning up faster and faster.
19. Recharge battery
20. Fill up the tank with fresh petrol. 20litres should be enough. IF YOUR CAR HAS NO CATALYTIC CONVERTER - mix fuel with 2-stroke engine synthetic oil. Doing so with CAT-equipped car will send the eco-friendly-magic-can straight to hell.
21. Fill the coolant system with distilled (exactly distilled - NOT tap) water and any radiator flush product safe to use on aluminium. Now try to test water pump condition by pulley spin if it’s spinning roughly or with grinding noise – you’ve got additional £119 project to complete. Spin until moving freely.
22. I bet you forgot about inertia switch that must be pushed down.
23. Check if auto transmission is on Parked.
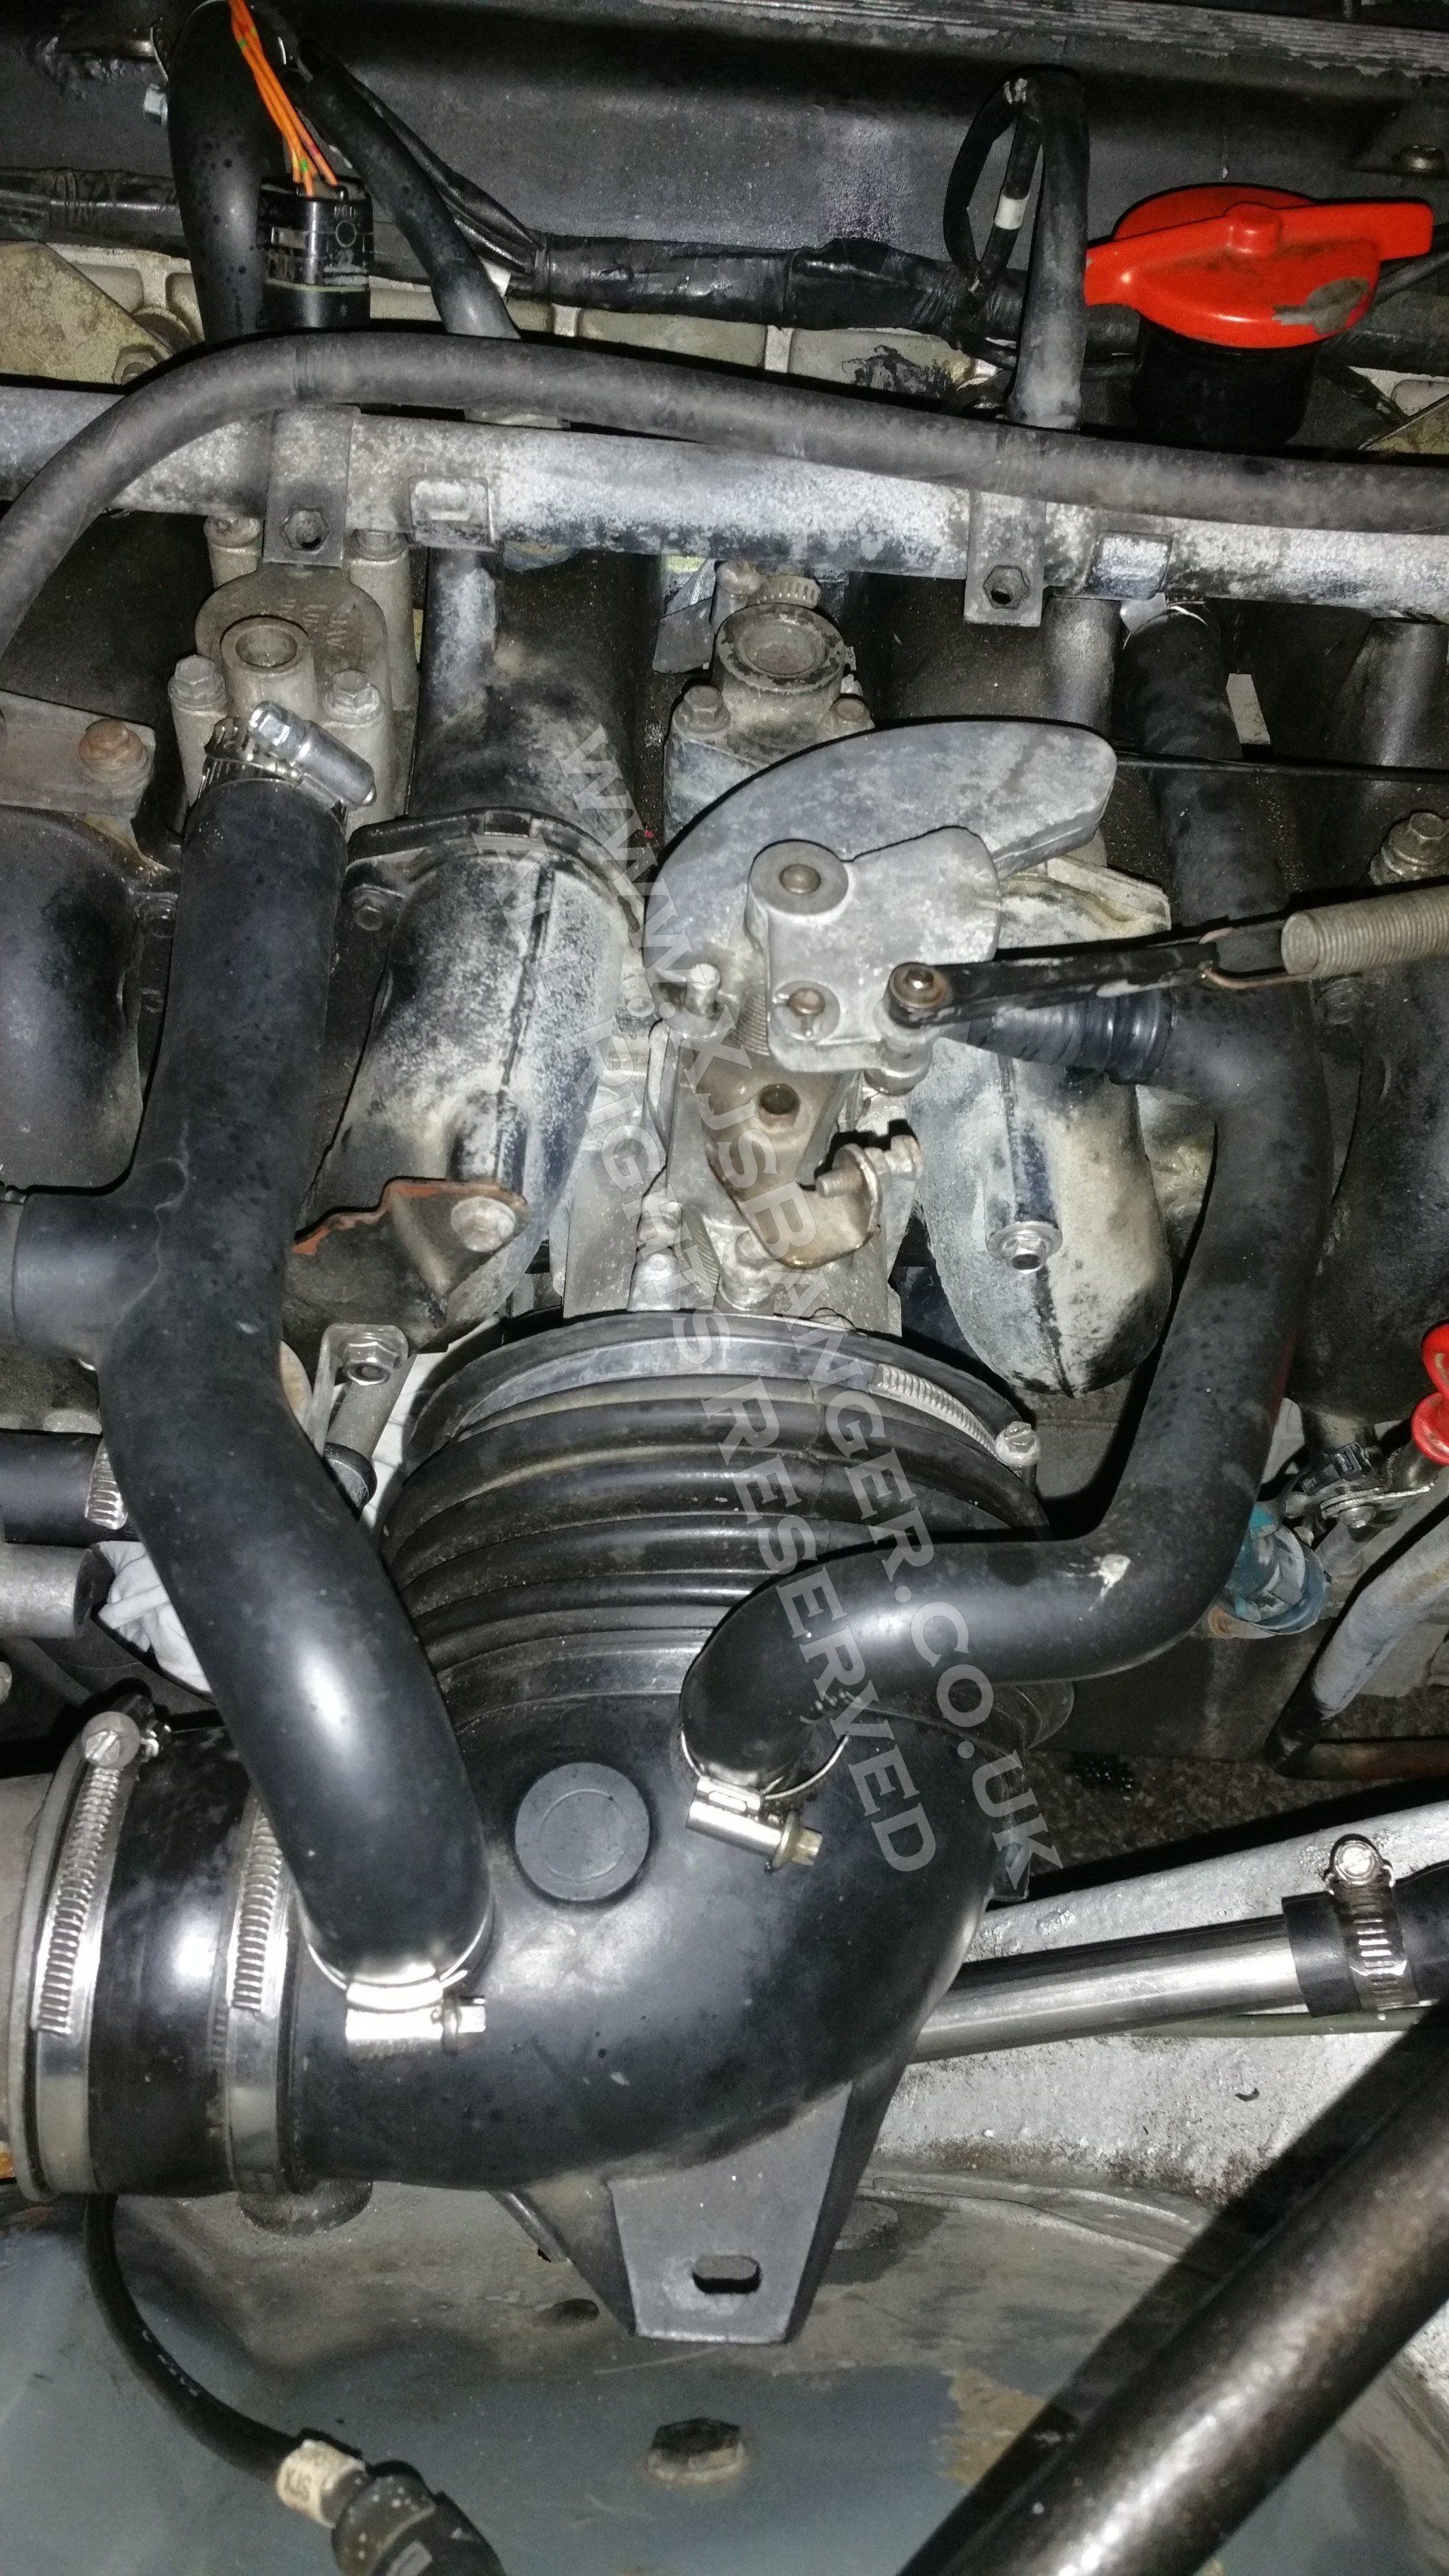
24. Reinstall the drive belt.
25. Reinstall the spark plugs, HT leads and distributor cap.
26. Drain excess of engine oil to make it read correct level on the dipstick. Check if oil is present in automatic transmission (should be way above max level on dipstick.
27. Ask your boyfriend to assist with JumpStart application. Do not engage starter motor yet. Turn off and on ignition 10 times with few seconds lag (you need to pump goo-fuel out from the fuel rail), then fire it up and start spraying, push the acceleration pedal half way down.
28. When you hear the engine whining sound and revving up - release the acceleration pedal immediately, but not entirely. let it run for no more than a 2-3 minutes. Shut it down. wait 5 minutes - you want to avoid damage/heat build-up on jamming components and cylinder head. Start the engine, this time without JumpStart spray (if not working - spray again). Repeat cycle 5 times then change the engine oil and filter while still warm - use cheapest semi-synthetic 10w40. Top up to max level on dipstick.
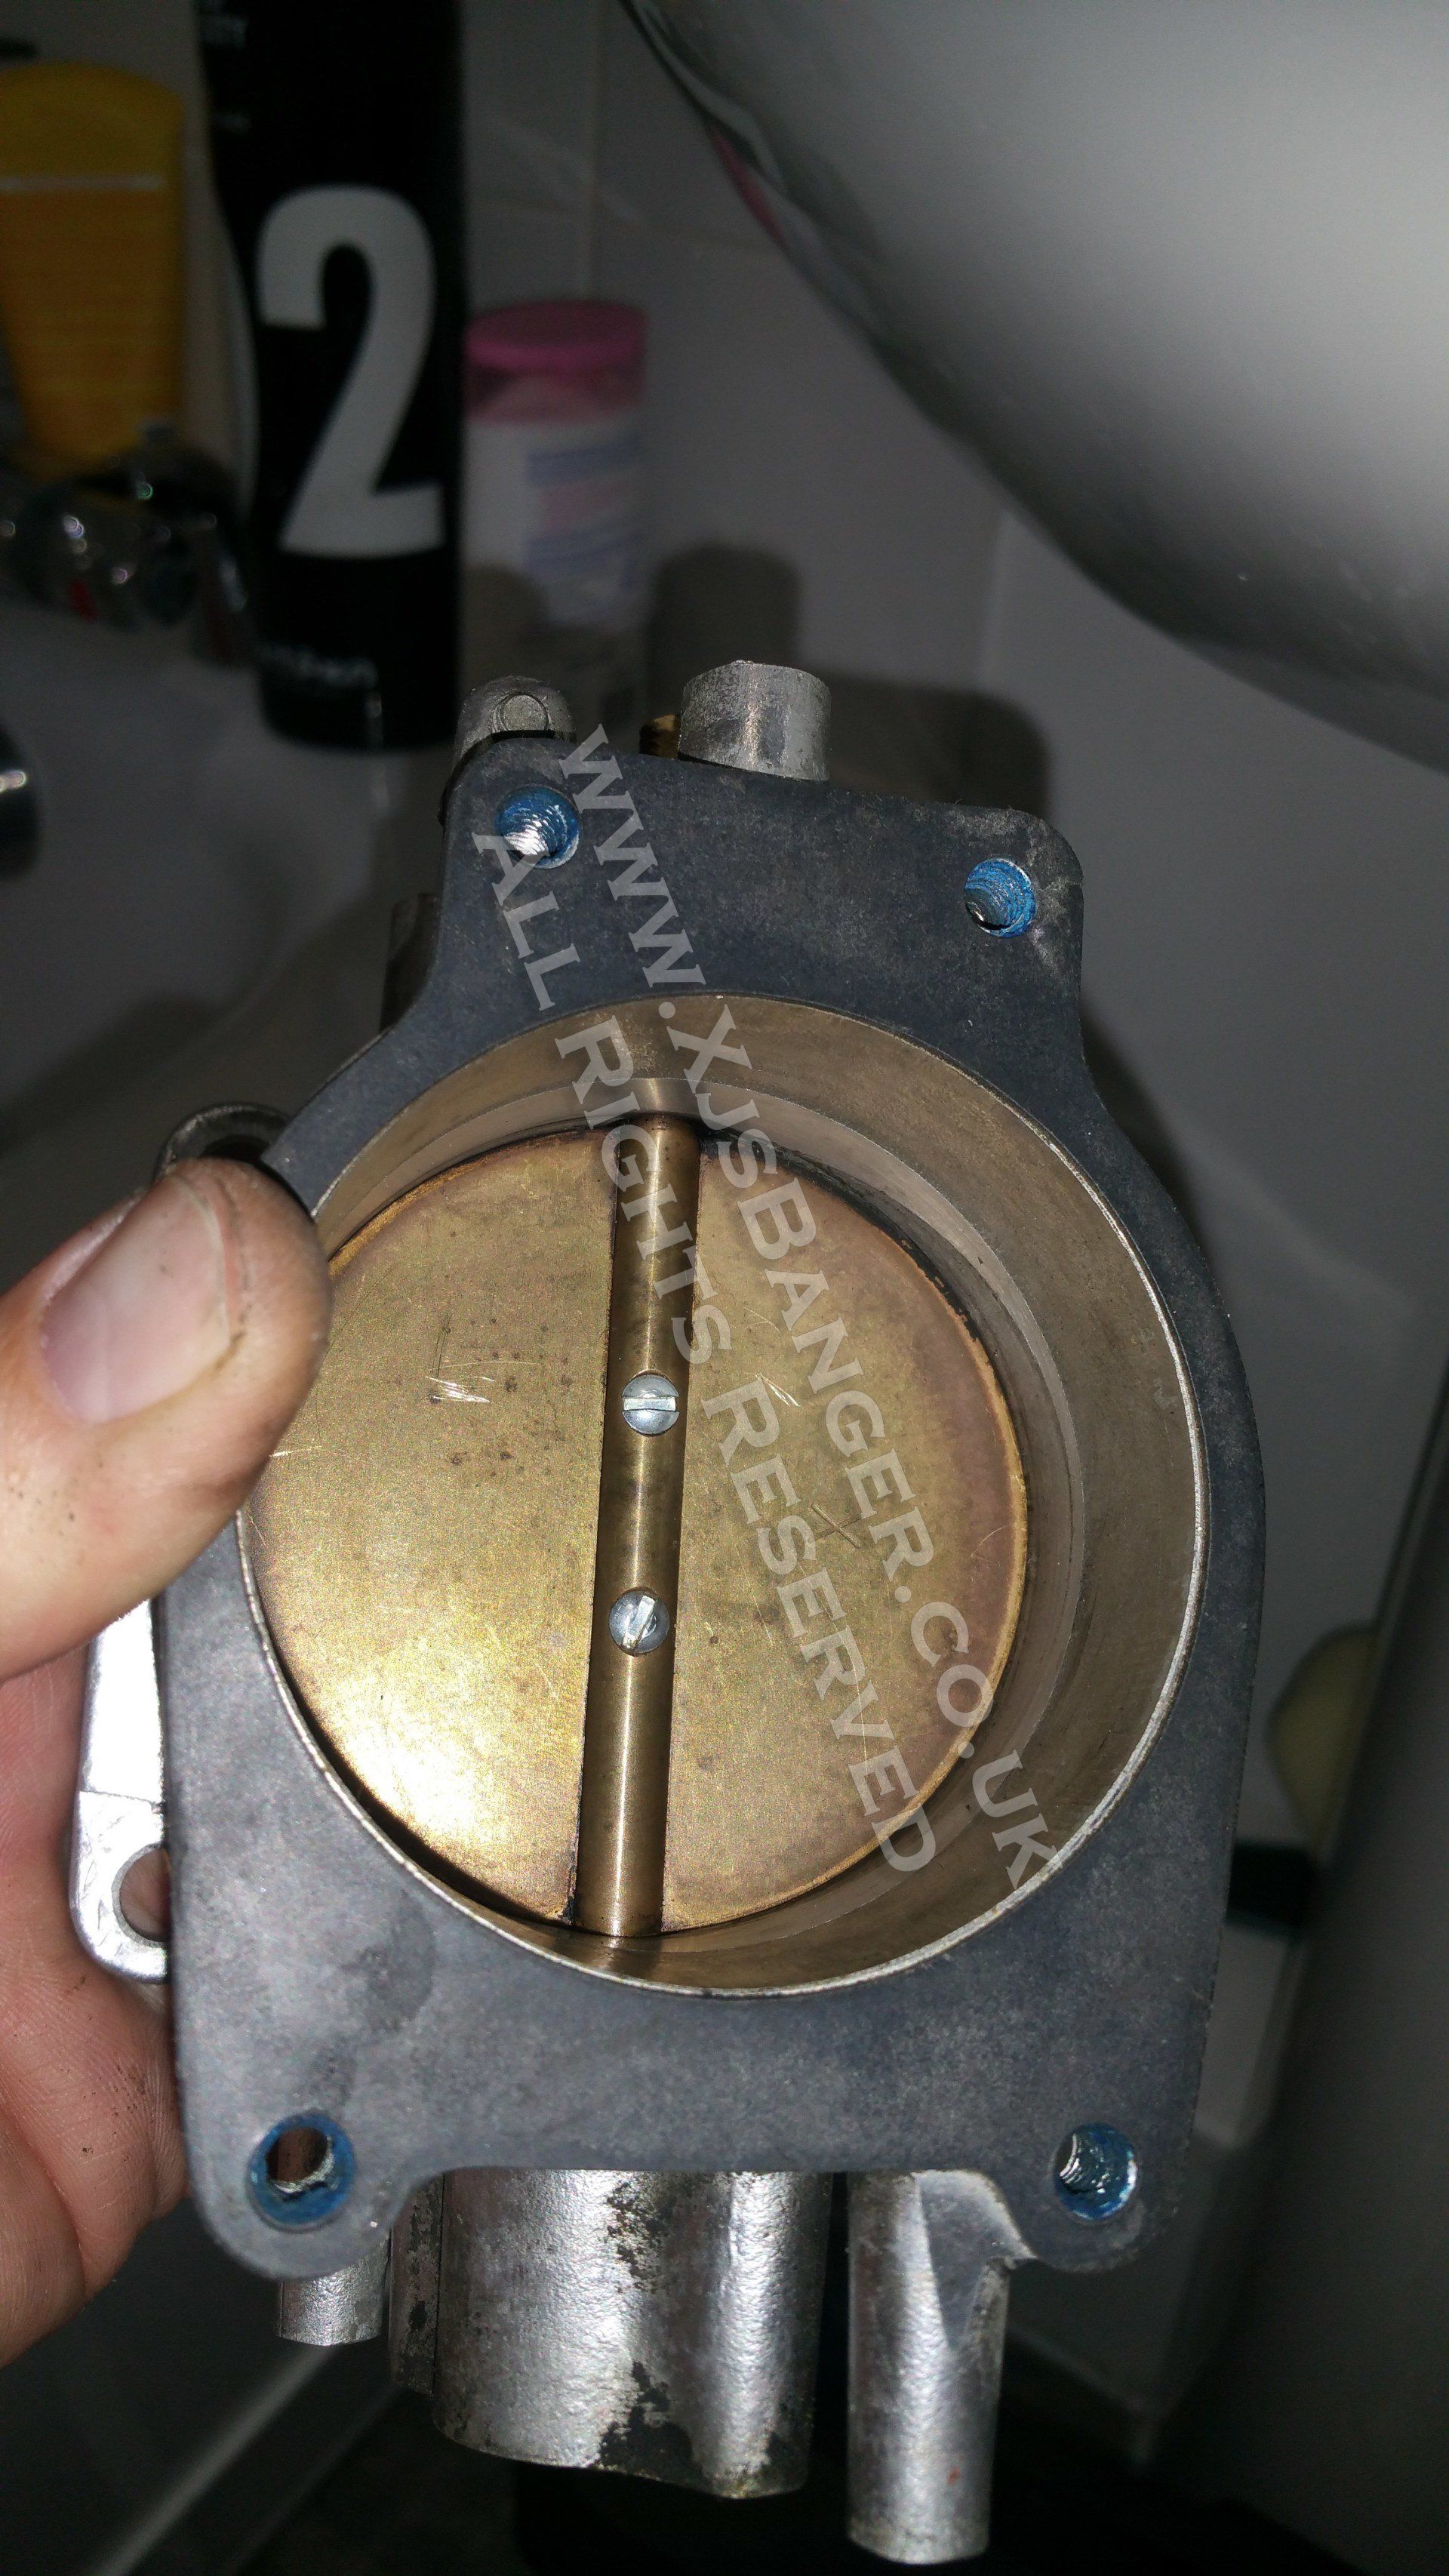
29. Now it's time to get the white oxy hedgehog out of your cylinder head. Hedgehog may be huge, huge enough to block coolant channels causing severe overheat of cylinder head and later on - your own. The chances are really low if your XJS was found with coolant in expansion tank. If your "barn find" XJS was found with coolant in the expansion tank - the chance that it was parked there yesterday is almost guaranteed (loser).
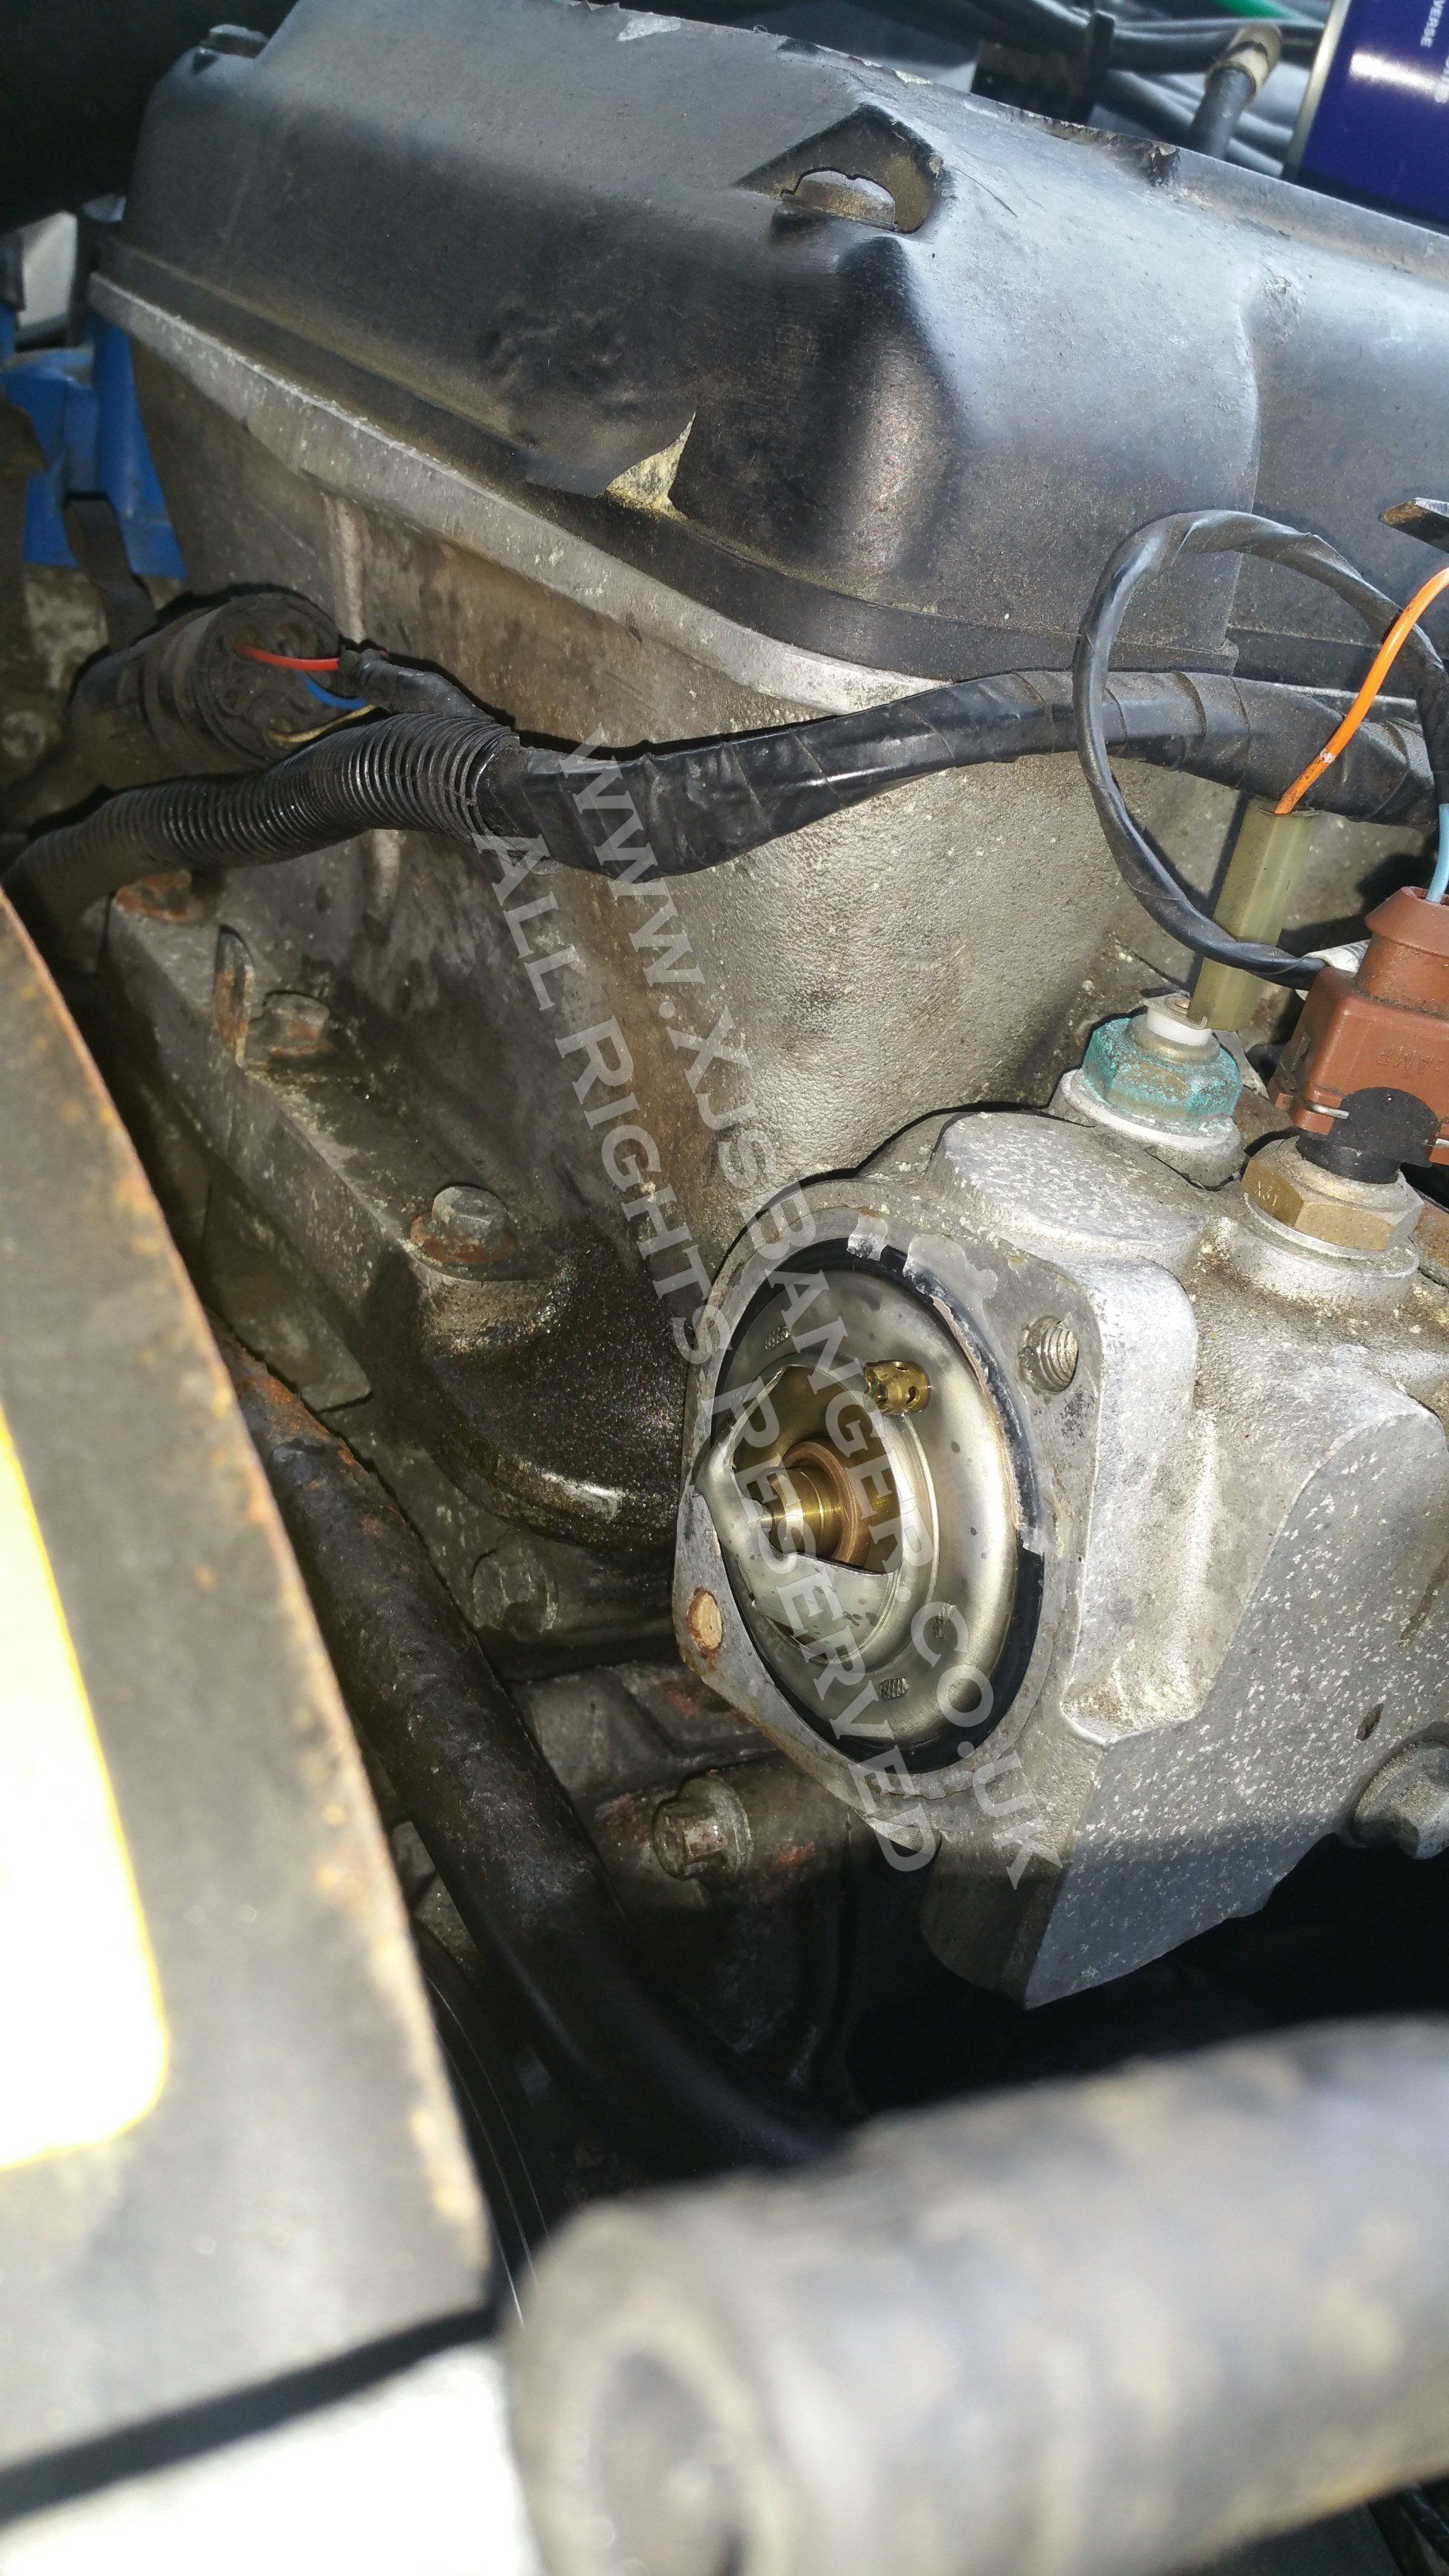
30. With your "radiator flush" and deionised water in the cooling system, with the new engine oil and all consumables including air filter and HT leads installed. With the grim reaper’s breath on your neck and without thermostat in the thermostat housing – start it up and… LISTEN. Don’t look at the gauges, just listen, cylinder top of the engine will give rattle when overheating. Check the temperature with your palm across the rocker cover, pump the radiator’s top hose by squeezing it. Any hot spot or rattle from the cam shafts – shut it down immediately. Run the engine with 5 minutes on / 5 minutes off intervals – for the next hour. If ok – increase the running time. Check the automatic transmission’s dipstick on hot running engine (level should be somewhere between cold and hot marks) – don’t engage the drive gear yet. Run it until the evening, top up with fresh fuel and leave it overnight. Drain the coolant system next day, reinstall new thermostat and refill with G05 concentrate + deionised water. You’re all done with the engine now. Well done, champ. Now you are ready to resurrect your gearbox…
16. Find the inertia switch and lift the round pin up until you will see the orange shank (you've just disconnected fuel pump)
17. Pour down the oil on the cam shafts one more time and reinstall the cover. DO NOT reinstall the spark plugs.
18 TURN ON IGNITION KEY AND CRANK THE ENGINE for 2 seconds, then 3 seconds, then 5 seconds, then 10 seconds. then wait 5 minutes and spin again for 10seconds. Repeat until your battery dies. You should hear the engine spinning up faster and faster.
19. Recharge battery
20. Fill up the tank with fresh petrol. 20litres should be enough. IF YOUR CAR HAS NO CATALYTIC CONVERTER - mix fuel with 2-stroke engine synthetic oil. Doing so with CAT-equipped car will send the eco-friendly-magic-can straight to hell.
21. Fill the coolant system with distilled (exactly distilled - NOT tap) water and any radiator flush product safe to use on aluminium. Now try to test water pump condition by pulley spin if it’s spinning roughly or with grinding noise – you’ve got additional £119 project to complete. Spin until moving freely.
22. I bet you forgot about inertia switch that must be pushed down.
23. Check if auto transmission is on Parked.
24. Reinstall the drive belt.
25. Reinstall the spark plugs, HT leads and distributor cap.
26. Drain excess of engine oil to make it read correct level on the dipstick. Check if oil is present in automatic transmission (should be way above max level on dipstick.
27. Ask your boyfriend to assist with JumpStart application. Do not engage starter motor yet. Turn off and on ignition 10 times with few seconds lag (you need to pump goo-fuel out from the fuel rail), then fire it up and start spraying, push the acceleration pedal half way down.
28. When you hear the engine whining sound and revving up - release the acceleration pedal immediately, but not entirely. let it run for no more than a 2-3 minutes. Shut it down. wait 5 minutes - you want to avoid damage/heat build-up on jamming components and cylinder head. Start the engine, this time without JumpStart spray (if not working - spray again). Repeat cycle 5 times then change the engine oil and filter while still warm - use cheapest semi-synthetic 10w40. Top up to max level on dipstick.
29. Now it's time to get the white oxy hedgehog out of your cylinder head. Hedgehog may be huge, huge enough to block coolant channels causing severe overheat of cylinder head and later on - your own. The chances are really low if your XJS was found with coolant in expansion tank. If your "barn find" XJS was found with coolant in the expansion tank - the chance that it was parked there yesterday is almost guaranteed (loser).
30. With your "radiator flush" and deionised water in the cooling system, with the new engine oil and all consumables including air filter and HT leads installed. With the grim reaper’s breath on your neck and without thermostat in the thermostat housing – start it up and… LISTEN. Don’t look at the gauges, just listen, cylinder top of the engine will give rattle when overheating. Check the temperature with your palm across the rocker cover, pump the radiator’s top hose by squeezing it. Any hot spot or rattle from the cam shafts – shut it down immediately. Run the engine with 5 minutes on / 5 minutes off intervals – for the next hour. If ok – increase the running time. Check the automatic transmission’s dipstick on hot running engine (level should be somewhere between cold and hot marks) – don’t engage the drive gear yet. Run it until the evening, top up with fresh fuel and leave it overnight. Drain the coolant system next day, reinstall new thermostat and refill with G05 concentrate + deionised water. You’re all done with the engine now. Well done, champ. Now you are ready to resurrect your gearbox…